Ever pulled up to a gas station and wondered what exactly happens between swiping your card and driving away with a full tank?
It’s easy to take fuel dispensers for granted, but these everyday fuel dispenser systems are marvels of modern engineering. Behind that familiar pump handle lies a network of precision parts working in perfect harmony.
So, what are the parts of a fuel dispenser? In this blog, we’re breaking down each component and explaining its role in plain English. We’ll explore fuel dispenser parts and function, show you how everything works together from start to finish, and even dive into fuel dispenser maintenance tips and replacement costs. To make things extra clear, we’ll include easy-to-follow diagrams and helpful lists along the way.
What Are the Parts of a Fuel Dispenser?
From the Inside Out: A Guide to Every Part of a Fuel Dispenser
What are the parts of a fuel dispenser? To answer that, we first need to define what a fuel dispenser is. At its core, it’s a piece of high-precision petroleum equipment designed to safely and accurately deliver fuel from underground storage tanks directly into your vehicle. But it’s far more than just a pump and a hose—it’s a complex system of mechanical, electronic, and hydraulic parts, each playing a critical role in ensuring every drop is measured correctly and every refuel is safe.
That incredible accuracy and reliability don’t happen by accident. They’re the result of each part of a fuel dispenser doing its job perfectly. Curious about what these parts are and what they do? You’re in the right place.
Let’s break down each component, from the nozzle you hold in your hand to the hidden tech deep inside the system.
Fuel Dispenser Parts List #1
Essential External Components You Should Know
These are the fuel dispenser parts you see and interact with every time you fill up your fuel tank.
Curious about their functions? Let’s take a closer look.
Swipe table →
| Part Name | What It Is | Why It’s Important |
|---|---|---|
| Dispenser Housing | The robust outer shell, typically made of cold-rolled steel or galvanized steel. | Protects sensitive internal components from weather, impacts, and vandalism. Its appearance also influences customer perception. |
| Display Screen (LCD/LED) | The digital screen that shows key information. | Provides transparency by displaying volume dispensed, price per unit, total cost, and sometimes instructions or advertisements. |
| Keypad / Touchscreen | The input interface for the customer. | Allows users to select fuel grade, enter a ZIP code, activate a loyalty program, or provide payment details. |
| Payment Terminal | Integrated card reader (EMV, NFC) for transactions. | Securely processes credit/debit, contactless, and fleet card payments, enabling a seamless self-service experience. |
| Receipt Printer | A small internal printer. | Provides customers with a paper record of their transactions for expense tracking or personal records. |
| Nozzle | The handheld device the customer inserts into the vehicle’s fuel tank. | Controls the flow of fuel and contains an automatic shut-off mechanism to prevent overfilling and spills. |
| Nozzle Boot | The bracket or hook that holds the nozzle when not in use. | Keeps the nozzle securely stored, off the ground, and ready for the next customer. |
| Fuel Hose | The reinforced flexible tube connecting the dispenser to the nozzle. | Carries fuel from the internal mechanism out to the vehicle. Designed to withstand high pressure and resist wear. |
| Breakaway Coupling | A safety device installed within the fuel hose. | Designed to split apart if a customer drives off without removing the nozzle, sealing both ends to prevent a major spill. |
| Emergency Stop Button | A prominently located red button, often on the front of the dispenser. | Allows station attendants or customers to immediately shut down all fuel flow in case of an emergency like a fire or collision. |

Fuel Dispenser Exterior Parts
Fuel Dispenser Parts List #2
The Internal Parts That Guarantee Efficient, Smooth, and Safe Fueling
These fuel dispenser accessories inside the casing handle the physical movement, measurement, and control of the fuel.
Swipe table →
| Part Name | What It Is | Why It’s Important |
|---|---|---|
| Flow Meter | The precision measuring device (often a piston or turbine type). | Precisely measures the volume of fuel passing through it. This ensures fair billing and regulatory compliance. |
| Pulser / Encoder | A sensor attached to the flow meter’s shaft. | Converts the mechanical rotation of the meter into electronic pulses. Each pulse represents a specific volume of fuel, allowing the computer to calculate the total. |
| Solenoid Valve | An electrically operated valve that controls fuel flow. | Acts as an electronic gatekeeper. It opens to allow fuel to flow when the system is activated and closes instantly when fueling stops or in an emergency. |
| Check Valve | A one-directional valve that allows flow in only one direction. | Prevents fuel from flowing backward in the system, which protects components and maintains prime in suction systems. |
| Flow Control Valve | A valve that regulates the rate of fuel flow. | Creates a smooth, consistent flow rate for customer convenience and prevents pressure surges that could damage the meter or cause “water hammer.” |
| Filter | A canister containing a replaceable filter element. | Removes dirt, rust, and other contaminants from the fuel before it reaches the meter and nozzle. Essential for protecting precision components and delivering clean fuel. |
| Submersible Turbine Pump | The primary electric pump located inside the underground storage tank. | Provides the high pressure needed to push fuel up from the tank, through the underground pipes, and into the dispenser. It’s the true “muscle” of the system. |

The Interior Parts of a Fuel Dispenser
Fuel Dispenser Parts List #3
The Internal Electronic & Control Systems That Manage Everything from Fueling to Transactions
These are the brains and nervous system of a fuel dispenser, managing everything from transactions to safety.
Swipe table →
| Part Name | What It Is | Why It’s Important |
| Electronic Control Board | The main computer board of the dispenser. | The “Brain”: It processes pulses from the meter, calculates the sale, controls all valves, manages the user interface, and communicates with the central point-of-sale system. |
| Communication Module | Hardware for data transfer (e.g., RS-485, Ethernet). | Enables real-time communication between the dispenser and the station’s central computer for authorization, pricing updates, and sales reporting. |
| Security Module | A dedicated, encrypted microprocessor. | Protects sensitive customer payment card data during transactions to prevent fraud and meet security standards. |

The Electronic Control Board of a Fuel Dispenser
Fuel Dispenser Parts List #4
Safety & Support Components for Ultimate Safety of Every Transaction
These fuel dispenser parts are dedicated to preventing accidents, containing hazards, and ensuring safe operation.
Swipe table →
| Part Name | What It Is | Why It’s Important |
|---|---|---|
| Shear Valve | A safety valve installed at the base of the dispenser where the fuel pipe connects. | Designed to automatically shear closed and shut off the fuel supply if the dispenser is hit by a vehicle, preventing a catastrophic spill. |
| Vapor Recovery System | A system of hoses, valves, and nozzles designed to capture fumes. | Captures harmful gasoline vapors released during refueling, preventing them from escaping into the atmosphere (reducing air pollution and smog). |
| Flame Arrestor | A device installed in vent lines or openings. | Prevents an external flame from traveling back into the dispenser or storage tank, stopping a potential explosion. |
| Grounding System | Wiring that connects the dispenser to a grounding rod. | Safely dissipates static electricity that can build up during fueling, eliminating a potential source of ignition near flammable vapors. |
How Does a Fuel Dispenser Work?
The Step-by-Step Process of Fuel Delivery & Dispensing

- Step 1: You Swipe and Select
It all starts with you. You pull up, swipe your credit card at the payment terminal, and press the button for the fuel grade you want on the keypad. This sends a signal to the dispenser’s electronic control board (its brain), saying, “A customer is here, and they’re ready for 10 gallons of Premium.”
- Step 2: The Brain Gives the Green Light
The control board talks to the gas station’s main computer to make sure your payment is approved. Once it gets the “all clear,” it prepares the fuel dispenser machine for action. It’s like the director shouting “Lights, Camera, Action!” to the crew.
- Step 3: The Muscle Wakes Up
When you lift the nozzle from its boot, you trigger a switch that tells the brain you’re ready. The brain then sends power to the submersible turbine pump—the real muscle located deep in the underground storage tank. This powerful fuel pump whirls to life, pushing pressurized fuel up through the underground pipes and into the dispenser itself.
- Step 4: The Clean-Up Crew Gets to Work
The pressurized fuel doesn’t go straight to your car. The fuel first passes through the dispenser’s filter, which removes dirt, rust, or traces of water so that only clean fuel reaches your vehicle. Next, it flows through the air eliminator, which removes any air bubbles. This step is critical because you should only be charged for actual fuel—not air.
- Step 5: The Meter Measures Every Drop
Next, the clean, bubble-free fuel flows into the flow meter. This is the honest heart of the operation. As fuel passes through, it spins an accurate mechanism inside. Every spin represents a tiny, exact amount of fuel. A pulser attached to the meter counts these spins and sends electronic “pulses” to the brain.
- Step 6: The Brain Does the Math
The control board receives these pulses and does the math: “Okay, 100 pulses equals one gallon. The price per gallon is $3.50. So, the total cost is…” It instantly sends this information to the display screen so you can see the volume and cost ticking up in real time.
- Step 7: You Control the Flow
You squeeze the nozzle’s handle. This physically opens a valve, but the brain is still in control. It sends a signal to the solenoid valve to open, allowing the metered fuel to finally rush through the hose and into your tank. If you let go of the handle, the solenoid valve slams shut instantly, stopping the flow.

- Step 8: The Magic Automatic Stop
You don’t have to worry about overfilling. As your tank gets full, gasoline splashes back into a small hole at the tip of the nozzle. This triggers a clever mechanical diaphragm inside that acts like a tiny switch, snapping the handle shut and stopping the flow. It’s a purely mechanical safety net that works even if the power goes out.
- Step 9: Wrapping Things Up
When the nozzle shuts off, you hang it back up. The brain sees this, closes the solenoid valve, and tells the underground pump to stop. Your transaction is finalized, and the receipt printer offers you a record. The display resets to zero, and the entire system goes back to sleep, ready for the next customer.
Common Fuel Dispenser Parts That Need Replacement & When
Get Your Complete Fuel Dispenser Parts Lists
Even the highest-quality fuel dispenser parts and accessories wear out over time. The table below lists the most common parts that require regular replacement to ensure optimal performance.
Swipe table →
| Part Name | Common Signs of Wear & Failure | Recommended Replacement Interval |
| Nozzle | Leaking trigger, failure to auto-shutoff, damaged spout | Inspect monthly; replace as needed or every 1-2 years |
| Hose | Cracking, blistering, stiffness, leaks at swivels | Every 3-5 years or immediately if damage is visible |
| Filter | Slow flow rate, erratic meter readings, pump strain | Every 6-12 months (or per manufacturer specs) |
| O-Rings & Seals | Visible leaks (liquid or vapor), loss of pressure | Replace during any repair; inspect proactively every 6 months |
| Solenoid Valve | Failure to dispense, slow flow, loud “hammer” noise | When diagnostics confirm failure (typically 3-5 years) |
| Flow Meter | Inaccurate calibration, jumping numbers, slow flow | 5-7 years; requires professional calibration after replacement |
For a comprehensive guide on maintaining the whole fueling system, be sure to check out the detailed maintenance takeaways in The Ultimate Guide to Gas Station Maintenance.
Typical Fuel Dispenser Part Replacement Costs
Swipe table →
| Part | Estimated Cost Range |
|---|---|
| Fuel Nozzle | $50 – $150 |
| Reinforced Fuel Hose | $100 – $300 |
| Inline Fuel Filter | $20 – $60 |
| Flow Meter | $200 – $600 |
| Solenoid Valve | $80 – $200 |
| Display Screen | $150 – $400 |
| O-Ring & Seal Kit | $10 – $40 |
Why OEM Parts are Non-Negotiable for Safety and Accuracy
When a critical component fails, it might be tempting to choose the cheapest replacement available. But when it comes to fuel dispensers, not all parts are created equal. Original equipment manufacturer (OEM) fuel dispenser parts are engineered to the exact specifications of your dispenser model.
They ensure:
- Perfect Fit: No leaks, no malfunctions due to improper sizing.
- Guaranteed Performance: Meets original accuracy and safety standards.
- Long-Term Reliability: Built with quality materials to last, protecting your investment.
- Regulatory Compliance: Essential for passing weights and measures inspections.
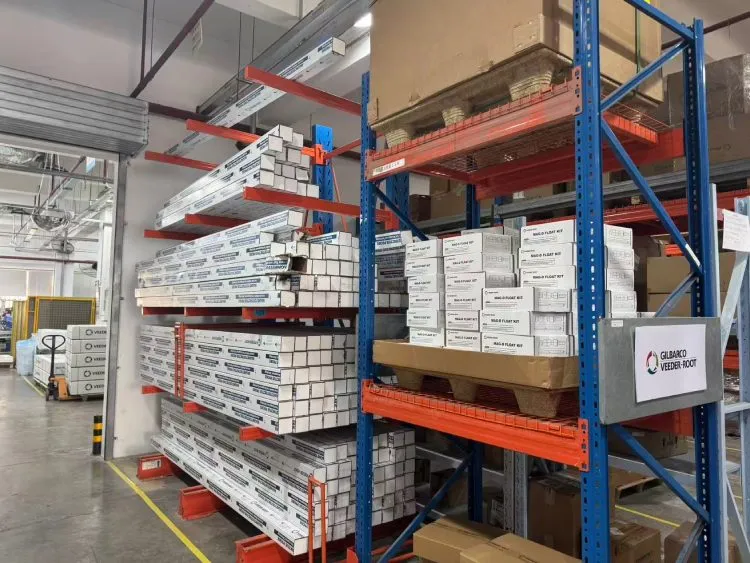
Using generic or counterfeit parts might save a few dollars upfront, but it risks meter inaccuracy, environmental hazards, and even catastrophic failures that could shut down your entire operation.
At Station Energy Tech, we supply genuine OEM fuel dispenser replacement parts from industry-leading brands like OPW, Gilbarco, Franklin Fueling, and Wayne. Don’t compromise your operation’s safety or efficiency—choose parts you can trust.
Explore our online store for authentic, reliable fuel dispenser parts.


